I have this thing for tins. I don't know where it came from and I've just realized it as a thing within the past year or so. What does that say about me that I like small metal containers? Apparently it is genetic. I mentioned it to my mother once and she said how she loves little tins too. Odd.
In addition to an inkling for tins, I hate to throw things away that could one day prove useful. I have never seen an episode of Horders because we don't have a tv, but I don't think I'm THAT bad. Or at least I hope so. Good thing upcycling/recycling is a trend.
Here is a nifty organizer you can make from recycled coffee cans. I've been saving them up to make one and today seemed like a good rainy day for it. Plus I needed a break from sewing. (But did you see this? Love it!)
What you will need:
5 coffee cans (metal or cardboard)
scrapbooking paper
craft glue
hot glue
foam brush
scissors
ruler
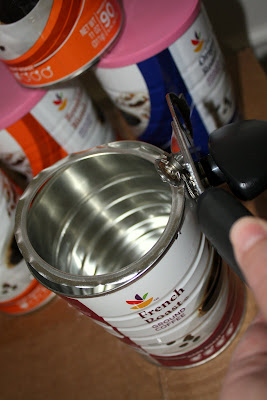
Use a can opener to remove any lip on the opening of your cans. (Unless you want it there for some reason. It would just annoy me.)
Measure the height of each can in between the small rim at top and bottom. Measure the circumference of the can. Cut a rectangle from each of your scrapbooking papers that is your can height x your can circumference. You will most likely find that your can circumference is longer than your paper since scrapbooking paper is a standard 12" square. Fret not; I have a plan.
Apply craft glue to 1/3 of your coffee can. Spread the glue as thin as possible with your foam brush to avoid bubbles, Make sure the glue covers the surface top to bottom.
Place your paper carefully on the can and smooth it over the section of glue. Continue to apply craft glue and paper around the can. Your paper edges will not meet. It will be ok. I promise. Repeat for your 4 other coffee cans.
I'm a sucker for putting things in color order.
Before you hot glue anything, hold two cans up together side by side. See how the little rim on the top and bottom prevent the sides from touching? When you hot glue your cans together you are going to off set them ever so slightly so they will lay flat.
Use a big ole fat line of hot glue to glue two cans together. Place the hot glue down the strips where the paper doesn't meet. See? I told you it would be ok. Hot glue the remaining three together. You should now have 2 sets of cans that look like this:
Nest the set of two cans on the set of three. Use a pencil and mark where the cans meet so you can apply your hot glue quickly and accurately. Hold the sets together until the glue cools. And you're done!
I'm going to use this set in my studio to hold thread and sewing tools. You can also drive nails through the backs of the cans to mount them on a board or wall. I'd love to see pictures if you make a set. You can post them in my Flickr pool here.


