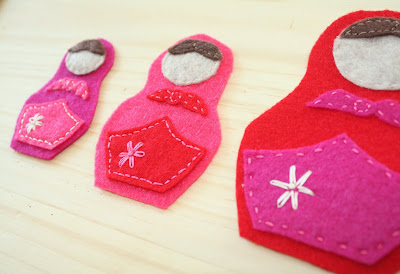
So, without further ado, I present:

Step 1: Print out the Matryoshka Ornament Pattern below. It should fill one sheet of printer paper.
Matryoshka Doll Ornaments Pattern
Step 2: Cut out each pattern piece in felt of your choice. Cut two of each main body piece. I found it easiest to keep each doll's patterns and felt together in a ziplock bag until it was time to sew. Mostly to keep Jimmy from mixing them all up.

Step 3: Stack hair and face piece and stitch onto one body piece. I used a basic running stitch, but you can get super fancy here. Or even use a sewing machine. Heck, you can make these ornaments without sewing at all. Just glue them. Hot glue, Elmer's glue, Arlene's glue. Sky's the limit.
Step 4:Stitch dress piece and kerchief tie piece to the same body piece. I added a lazy daisy stitch with a french knot center. You could stitch a heart. Or a button. Or embroider a name. Again, go ahead and run with it.

Step 5: Stitch on a face: two french knots and a curved stitch. I think I will make a man one next with a mustache.

Step 6: Align the front body piece (the one you stitched all the parts to) with the back piece. Starting at the lower left hand corner stitch up the left side, around the head and back down to the lower right corner. Make sure you add a loop of ribbon so your ornament can hang. I cut my ribbon to 7 inches to make a nice big loop. Little kids can struggle with these things.

Once you stitch your way back to the right corner, stuff your doll ornament. I used Pellon Perfect Loft which I must say is just lovely to use. It's light and fluffy and easy to stuff. I have also stuffed little guys like this with felt scraps too. It all depends on how finicky you want to get about it. Stitch the remaining bottom edge closed.
Admire your handiwork.

Happy Holidays, ya'll.

