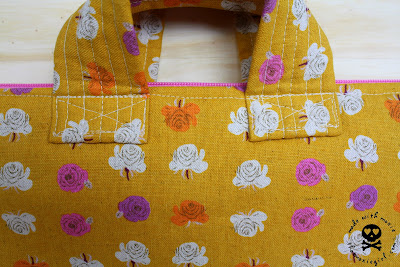
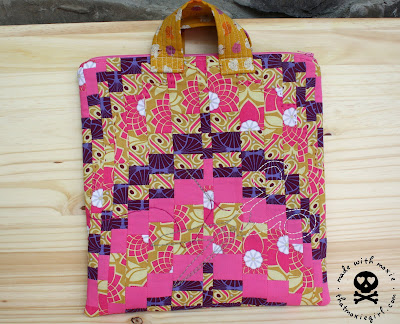
Today I'm going to share with you how I made a Bargello Bag for my good friend, Rachael at Imagine Gnats. I made it for her to carry her embroidery projects around. Little did I know that before I made her this bag she was carrying around her embroidery project in a jar. A jar! You know what they say about the cobbler's children...

To start, choose a group of coordinating fabric fat quarters. Cut them into strips of varying widths of your preference, and so that they are 22" long. Decide on a visually pleasing order and stitch them all together using a 1/4" seam allowance and pressing your seams open as you go. All seams allowances for the Bargello are a 1'4".

Fold your bottom most edge up to meet the top and stitch together to form a tube.


Lay your tube in half on your cutting mat. Trim your selvedge pieces off making a squared edge. Use your rotary cutter to slice off a piece of your tube of a width of your choosing. I advise doing any widths between 3/4" and 3". Anything smaller is eaten up in seam allowances and anything larger visually disrupts the bargello pattern.

Use a pair of scissors and open up your first bargello tube slice at any seam.

Cut two more slices of your bargello tube that are the same width as each other, but different than slice #1.

Hold bargello slice #2 next to the top of slice #1 and shift the slice so that the fabric at the top of #2 is a step lower than that on slice #1.

Cut both bargello slice #2s open at that spot and lay them on either side of slice #1.

Continue cutting sets of matching width slices, adjusting the position you cut the tube open at and laying them on either sides of your previous slices to create your Bargello Bag pattern.

I started with slices #2 as the widest and made each subsequent slices smaller and smaller through #8. Continue cutting slices until you run out of tube.

Now, the fun part of a Bargello is that is doesn't need to stay in the symmetrical arching down shape. You can flip the entire thing upside down so it arches up. Or you can re-order your Bargello slices to create a roller coaster or zigzag shapes.


Choose the Bargello shape you like the best. I ended up sticking with my original design. Starting at one end of your slices, start sewing them together with a 1'4 inch seam allowance. It is important to keep track here of which slice goes where here and up and down. Now is not a good time for distractions.

Press your seam allowances open as you go. They may not be lying perfectly on the back but do your best in order to keep the seam allowance bulk down.

This is also the point when I get super excited because I can see my pattern coming together. Clap your hands together and admire your Bargello, folks!

Press your Bargello really well and lightly spray with spray starch to keep its shape. I then fused my Bargello Bag front to a piece of Pellon Fusible Thermolam Fleece. Use your rotary cutter and clear rulers to square your Bargello Bag front edges.
I used a clip art image of old fashioned-ly looking scissors to print and trace onto my bag front.

I used embroidery floss to stitch the scissors. I also stitched a running stitch across a top run of Bargello steps then stitched a needle and thread, too.

My fabric selections for the Bargello Bag backing and linings.


I also used some coordinating scraps to stitch up a little needle book, too, using this pattern by Rashida Coleman-Hale. I love this little pattern and have made them for mini coin purses for my daughter, Jane and needle books for myself.
Here's the bags in action with some of Rachael's amazing embroidery!

Thanks for stopping by and if you try your hand at a Bargello Bag I'd love to have you share pictures here on Flickr.
Until next time!

