Today I am going to be teaching you how to make Block Three of the Cathedral Window QAL. I hope you all are sewing along with us. There have been two amazing blocks revealed already (
Block One and
Block Two) and don't forget that there are some
amazing prizes to be won for sewing along.
Skill level: Intermediate, but Beginners should not be afraid. You can do this and I have written clear instructions and taken loads of photos for you to follow along.
Visit the
Pellonprojects.com to download a PDF of these instructions and photos.
Fabric requirements:
Background fabric: (1) Fat Quarter
Frame fabrics: (1) Fat Quarter
Window fabrics: three (3) squares (6", 4" and 2" scraps)
Materials needed:
Pellon WonderUnder 805 Fusible Web (6", 4" and 2" squares)
Thread
Tools needed:
Sewing machine
Pins
Rotary cutter
Quilting ruler
Iron & Ironing Board
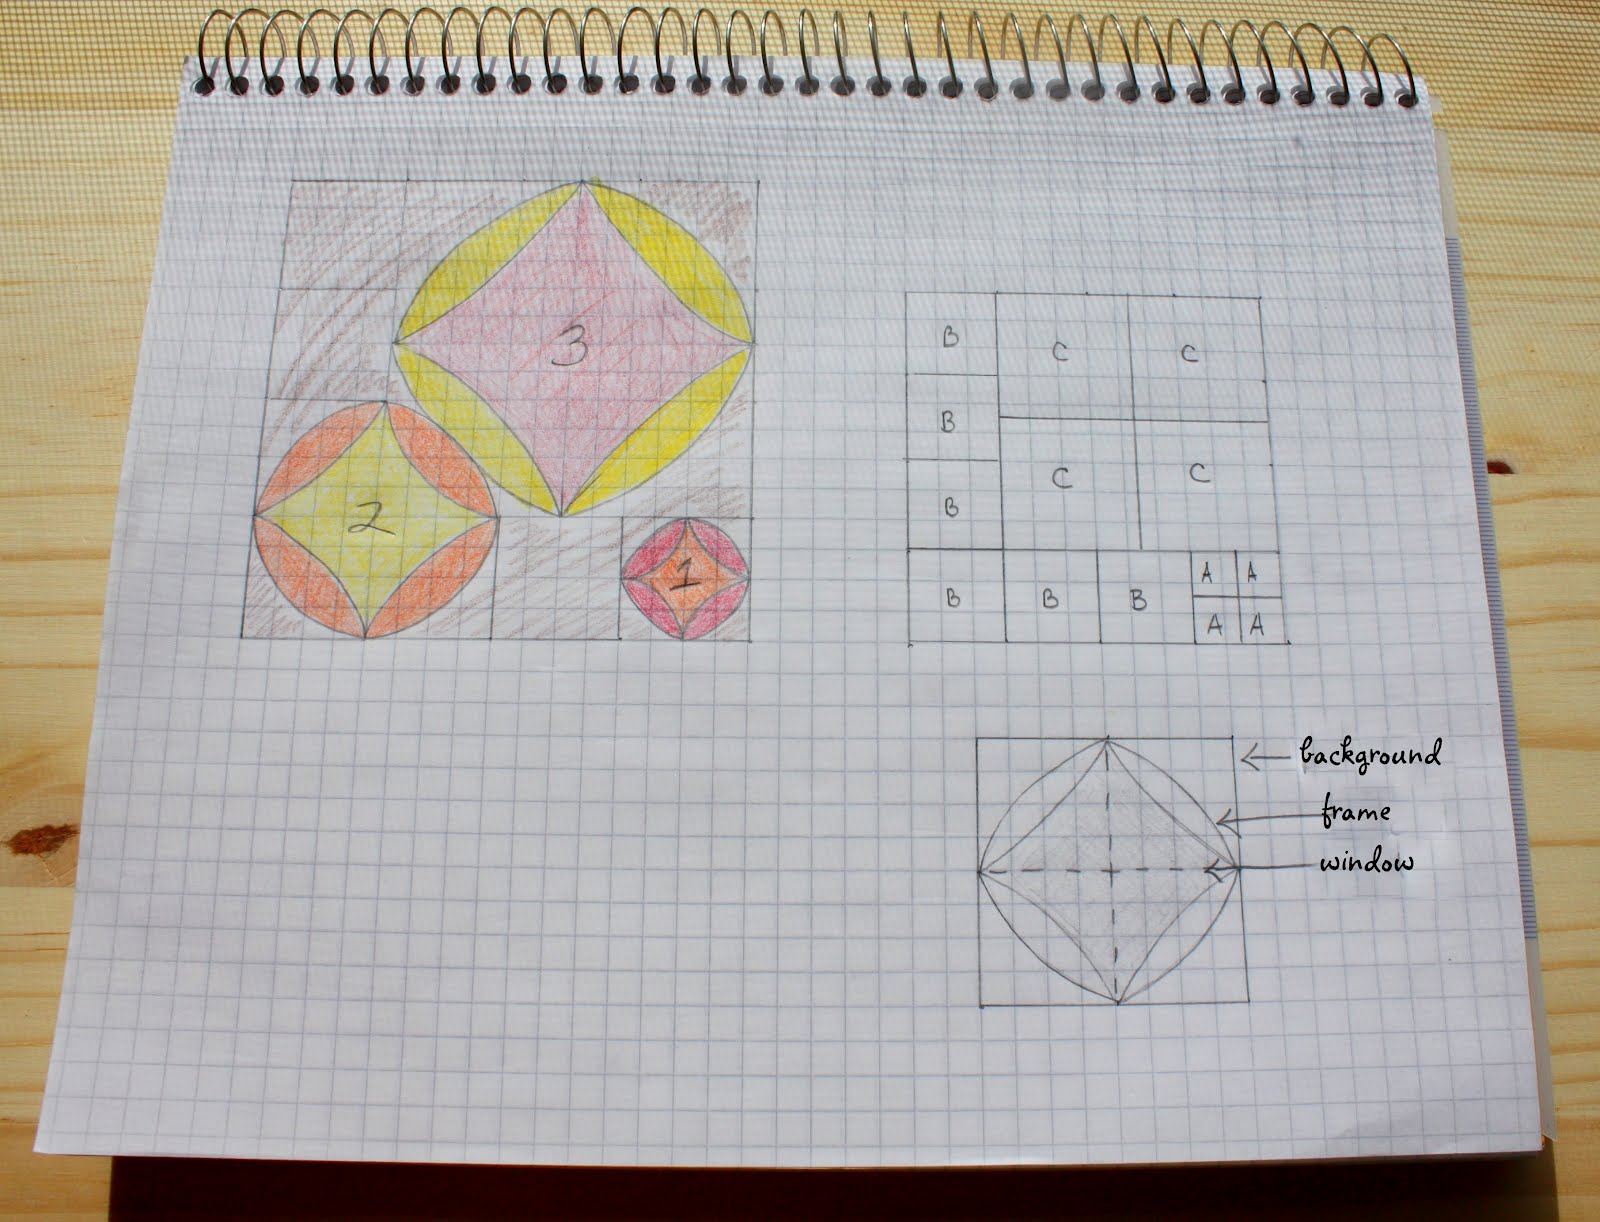
Quilt Key
Cutting Instructions:
Use a rotary cutter and quilting ruler to cut the following:
Background fabrics:
• Four (4) 2” squares (A)
• Six (6) 3 1/2” squares (B)
• Four (4) 5” squares (C)
Frame fabrics:
• One (1) 3 1/2” square
• One (1) 6 1/2” square
• One (1) 9 1/2 ” square
Window fabrics:
• One fussy cut* (1) 1 3/4 ” square
• One fussy cut* (1) 3 7/8” square
• One fussy cut* (1) 6” square
*Fussy cut means to cut the piece to specifically put a certain pattern in the middle of your cut piece. These Window fabric Squares will be what you see in the centers of your Cathedral Windows.
Pellon WonderUnder:
• One (1) 1 3/4 ” square
• One (1) 3 7/8” square
• One (1) 6” square
Assembly Instructions:
All seam allowances are 1/4”.
Pellon WonderUnder
Follow Pellon WonderUnder application instructions and fuse Pellon WonderUnder to the wrong sides of the three Window fabric squares.
Cathedral Window #1 (Smallest window)
Need four (4) Background fabric squares (A) and smallest Frame fabric square (3 1/2 ”.)
Fold Frame fabric square in half, wrong sides together.
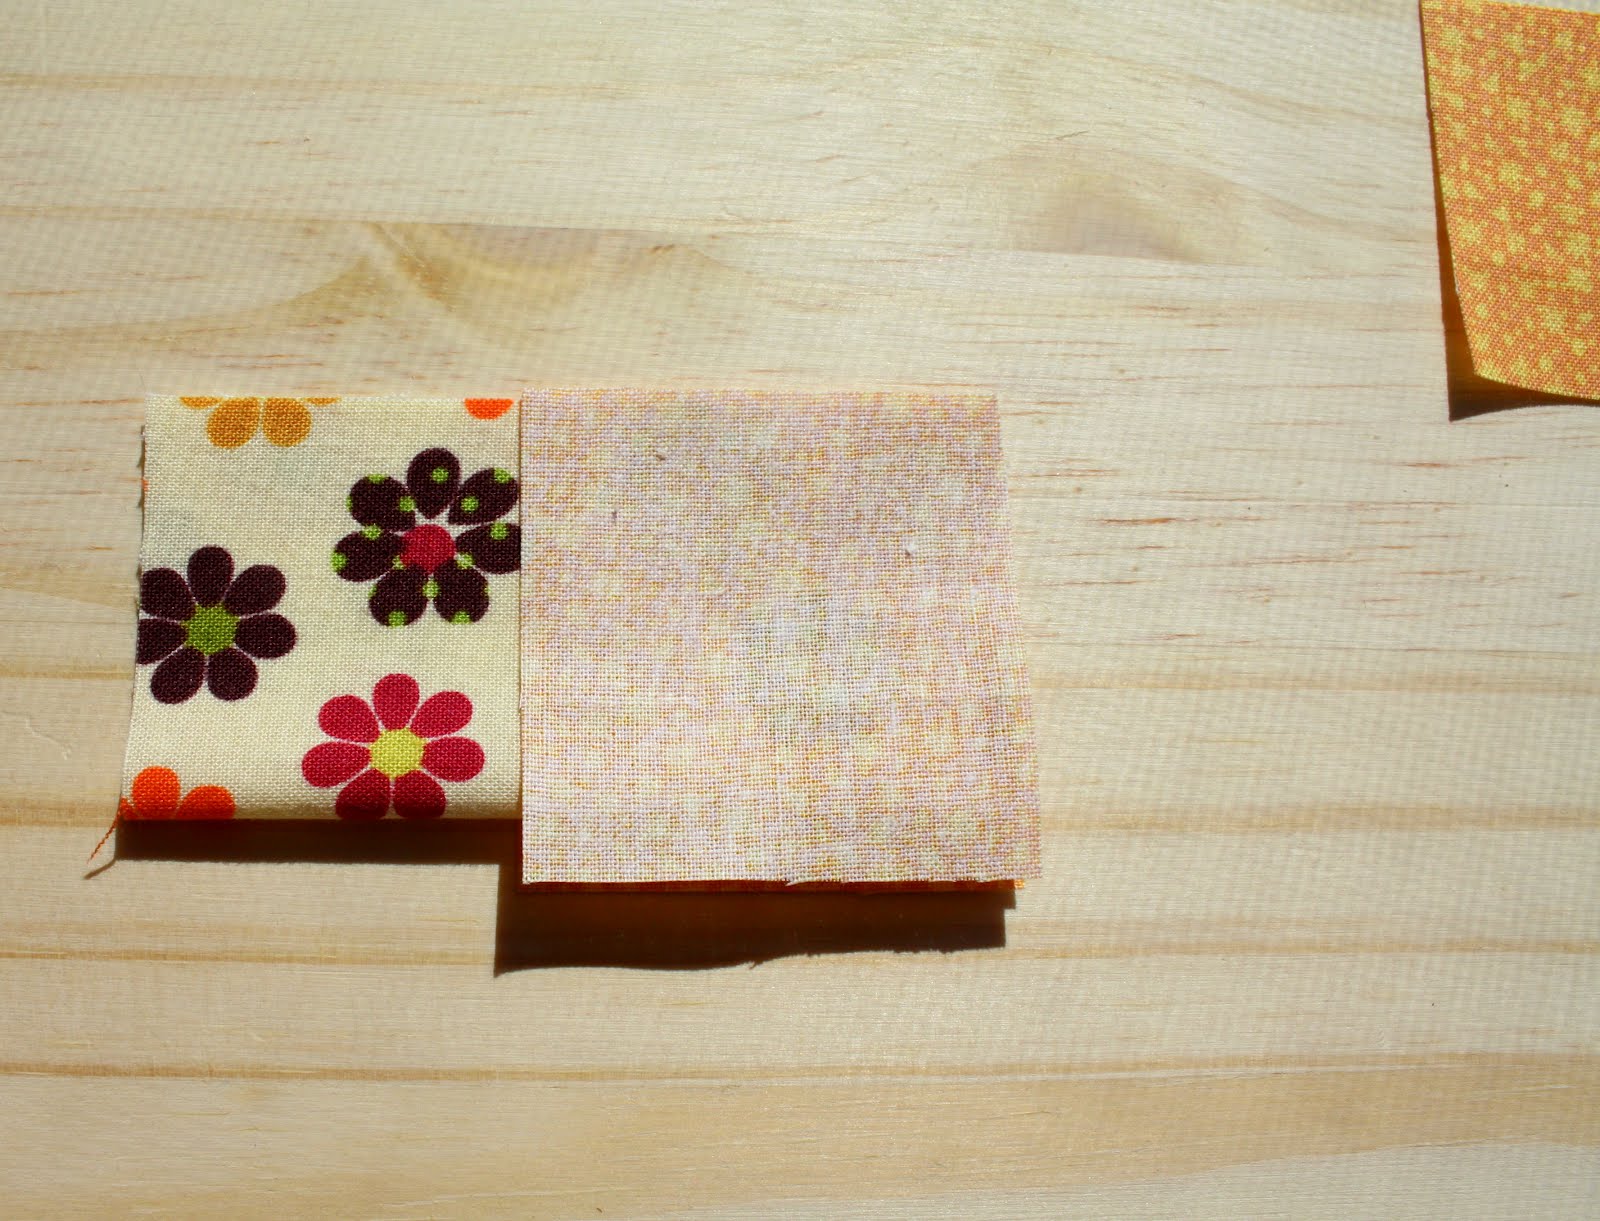
Align one Background square (A), right sides together, with a raw edge corner of the folded Frame square.
Place a second Background square (A), right sides together, on top of folded Frame square in the same corner. The Background fabric squares should extend 1/4” further than the folded edge of the Frame fabric.
Pin and stitch a 1/4” seam from the top of the Background squares to the bottom. Repeat with remaining two (2) smallest Background squares (A) on the other raw edge of the folded Frame square.
Press seams back.
Open the fold in the Frame fabric square.
Align the seams together with open seam allowances
and pin stitched background squares together with the folded Frame square sandwiched in between. This may take some shifting of the Frame square fabric and the bulk of the fabric will not lay flat once the seam is pinned. The folded edges of the Frame fabric square should be 1/4” short of the raw corners of the stitched Background squares.
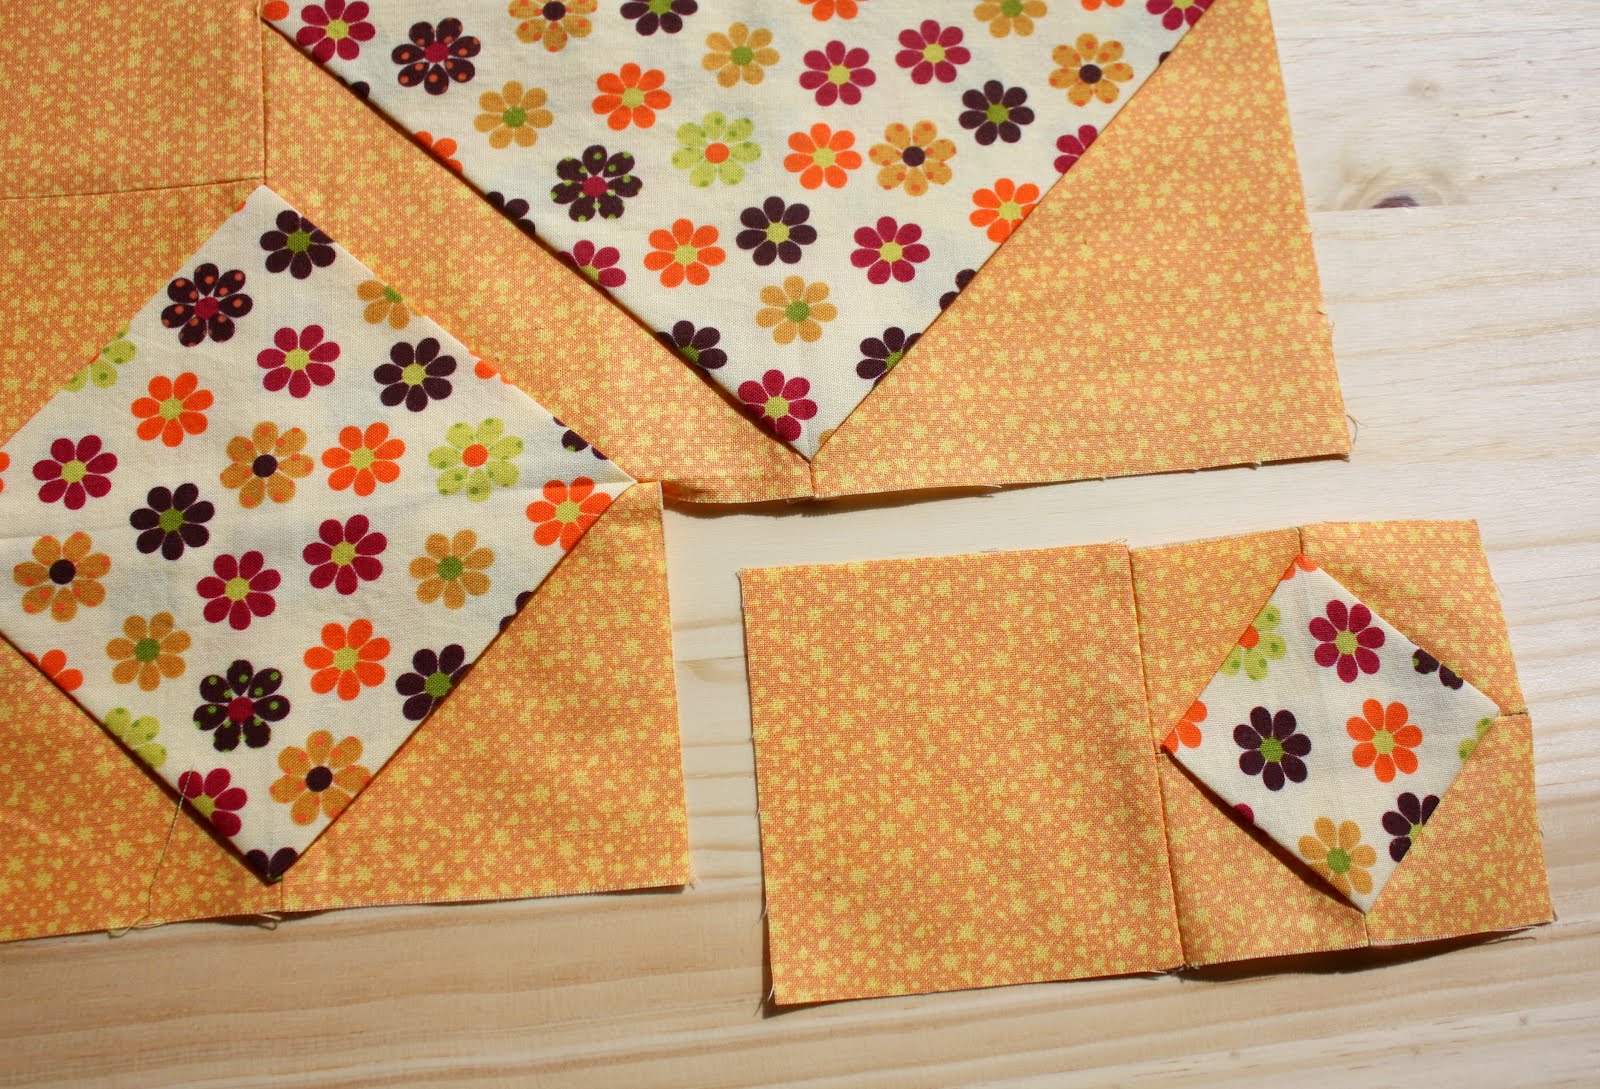
Stitch pinned seam from raw edge to raw edge of stitched background squares. When opened, the Cathedral Window should appear as a sideways square on the background fabric.
Press seams open and Frame fabric flat.
Cathedral Window #1 should be the same size as a Background square B, or 3 1/2”.
Cathedral Window #2 (medium window)
Need three (3) medium Background fabric squares (B), one (1) large Background fabric square (C) and medium Frame fabric square (6 1/2 ”.)
Fold Frame fabric square in half, wrong sides together. Align large Background square (C), right sides together, with a raw edge corner of the folded Frame square.
Place a medium Background square (B), right sides together, on top of folded Frame square in the same corner. The medium Background fabric squares should extend 1/4” further than the folded edge of the Frame fabric.
Pin and stitch a 1/4” seam from the top of the Background square stopping 1/4” from the bottom of the medium Background square edge. Repeat with remaining two (2) medium Background squares (B) on the other raw edge of the folded Frame square but stitch all the way to the bottom edge of the Background fabric.
Press seams back.
Open the fold in the Frame fabric square and align the seams together with open seam allowances and pin stitched Background squares together with the folded Frame square sandwiched in between. This may take some shifting of the Frame square fabric and the bulk of the fabric will not lay flat once the seam is pinned. The folded edges of the Frame fabric square should be 1/4” short of the raw corners of the stitched Background squares. On the edge with the largest Background square (C), place a pin where the folded Frame square edge is. This should be 1/4” from the edge of the medium Background square (B).
Stitch pinned seam from the top raw edge of stitched background squares to the pin that marks the edge of the folded Frame. When opened, the Cathedral Window should appear as a sideways square on the background fabric.
Press seams open and Frame fabric flat. Do not press the edges of Background fabric square (C).
Cathedral Window #3 (largest window)
Need remaining three (3) large Background fabric squares (C), completed medium Cathedral window and large Frame fabric square (9 1/2”.)
Fold Frame fabric square in half, wrong sides together. Align the large Background square of completed medium Cathedral Window, right sides together, with a raw edge corner of the folded Frame square.
Place a large Background square (C), right sides together, on top of folded Frame square in the same corner. The large Background fabric squares should extend 1/4” further than the folded edge of the Frame fabric.
Pin and stitch a 1/4” seam from the top of the Background square to the bottom edge. Repeat with remaining two (2) large Background squares (C) on the other raw edge of the folded large Frame square. Press seams back.
Open the fold in the large Frame fabric square and align the seams together with open seam allowances and pin stitched background squares together with the folded Frame square sandwiched in between. This may take some shifting of the Frame square fabric and the bulk of the fabric will not lay flat once the seam is pinned. The folded edges of the Frame fabric square should be 1/4” short of the raw corners of the stitched Background squares.
Stitch pinned seam from edge to edge. When opened, the large Cathedral Window should appear as a sideways square on the background fabric and should be attached with the medium Cathedral Window.
Assembling the Block
Need remaining three (3) medium Background fabric squares (B) and completed small Cathedral Window #1.
Pin completed small Cathedral Window #1, right sides together, to one (1) medium Background fabric square (B) along one edge. Stitch together with a 1/4“ seam. Stitch remaining two (2) medium Background fabric squares (B) together along one edge with a 1/4“ seam. Press both seams open.
Take the stitched together two medium Background fabric squares and align them into the top left corner of the assembled medium and large Cathedral Window squares.
Pin the bottom edge of the stitched Background squares piece to the top exposed edge of the medium Cathedral Window, right side to right side. Place a pin 1/4“ from the inside corner edge. This should also be where the middle seam from the medium Cathedral Window ends.
Stitch seam from outside edge to inside edge, stopping 1/4 “ from end where the pin is. Back tack for stability.
Press that seam open.
Now fold this long Background piece to the right and align with the left raw edge of the large Cathedral Window, right sides facing. Pin seam and place a pin where the 1/4 “ stitched seam from the middle of the medium Cathedral Window begins.
Stitch this seam from the top of the block to the last pin. Press seam open.
Completing the Block
Take the small Cathedral Window and Background square piece and align them into the bottom right corner of the Block.
Pin the left edge of the small Cathedral Window and Background square piece to the right exposed edge of the medium Cathedral Window, right side to right side.
Place a pin 1/4“ from the inside corner edge. This should also be where the middle seam from the medium Cathedral Window ends.
Stitch seam from outside edge to inside edge, stopping 1/4 “ from end where the pin is. Back tack for stability. Press the seam open.
Now fold this long Background piece up onto the large Cathedral Window, right sides facing, and align the raw edges. Pin seam and place a pin where the 1/4 “ stitched seam from the middle of the medium Cathedral Window begins.
Stitch this seam from the right of the block to the last pin. Press seam open.
The Block is now assembled and the hard part is done!
Completing the Cathedral Windows
Remove the paper backing from the Pellon WonderUnder already applied to the Window fabric squares. Place the Window fabric squares in their respective Frames, making sure they are in the very middle and the points are aligned. Fuse Window fabric squares into the Frames following Pellon instructions.
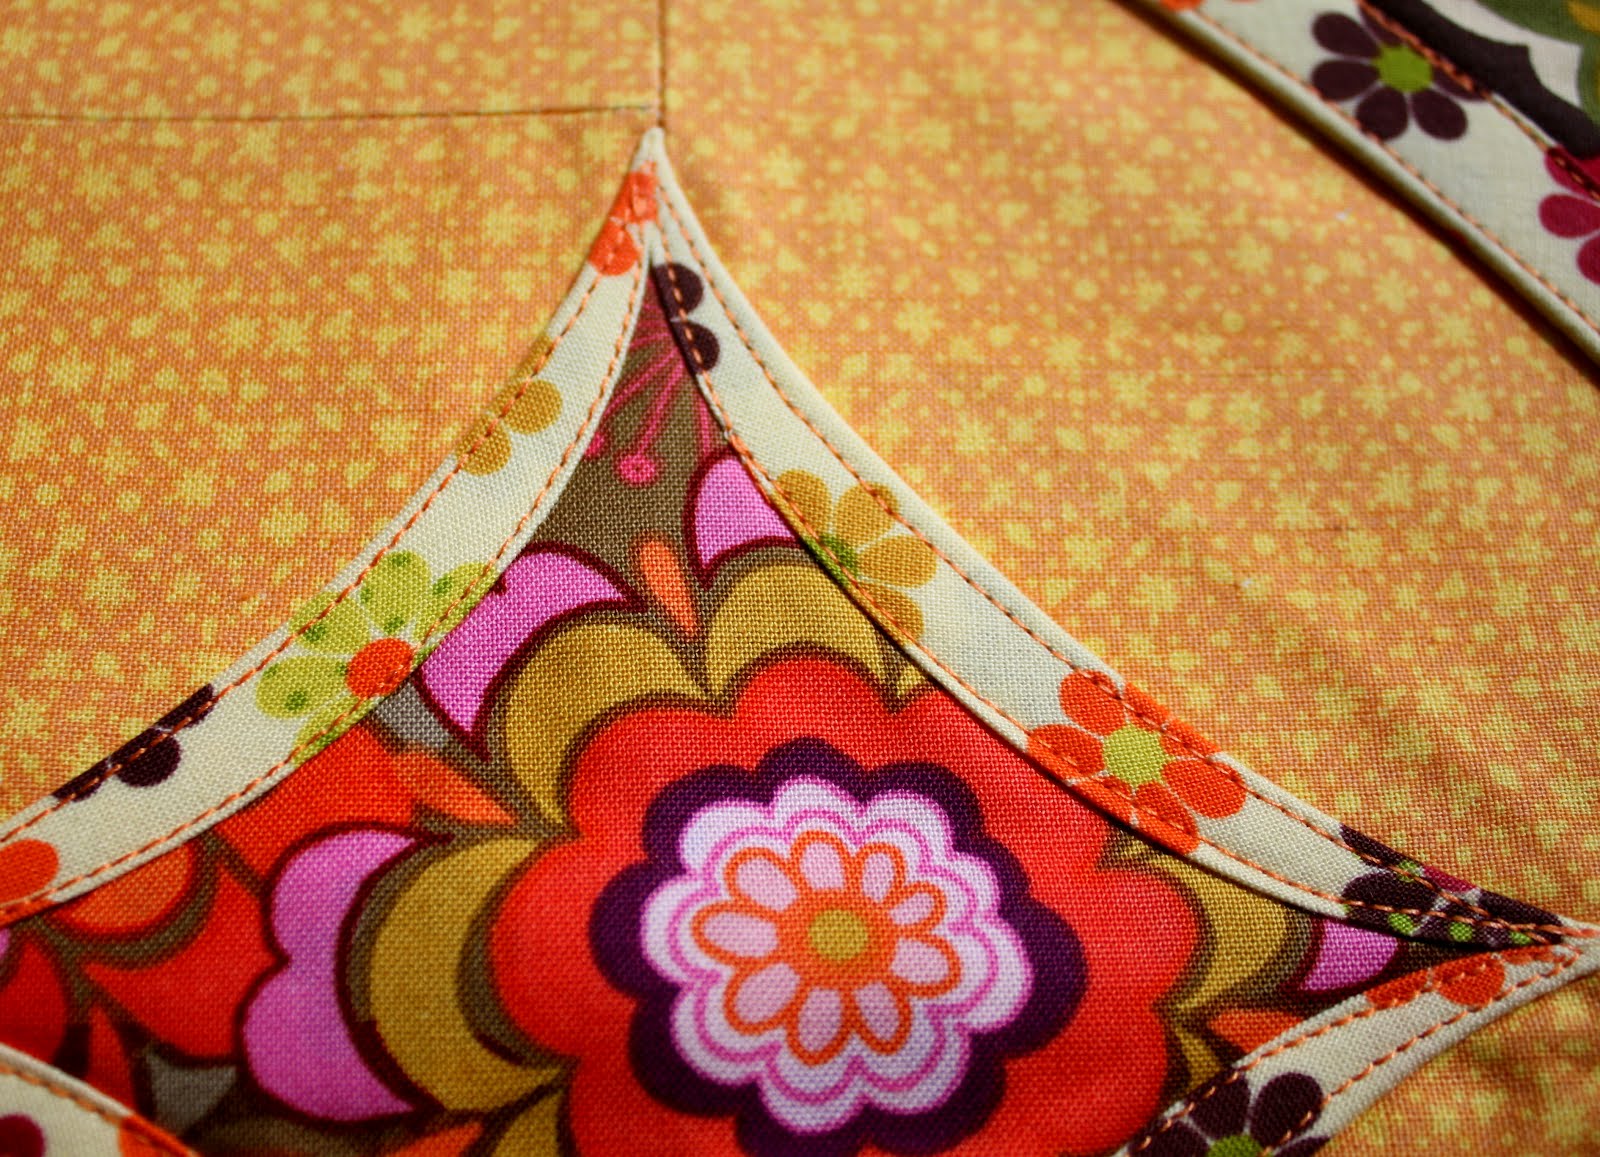
In the large Cathedral Window, roll one edge of the Frame piece over the Window edge towards the center of the window. Make sure the rolled piece covers the raw edge of the Window fabric from point to point. Pin in place.
Topstitch along the very inside edge of the rolled over Frame piece. Back tack to hold stitches.
Roll the next three edges of the large Cathedral Frame edges towards the center, catching the raw edges and points of the Window fabric squares under the rolls. Topstitch each one in place. Roll the edges and stitch the medium and small Cathedral Window Frame edges.
Top stitch along the outside edge of each rolled Cathedral Window Frame edge.
Pat yourself on the back. You’ve made the Modern Cathedral Window Block!
Finish as a modern mini quilt,
or add this block into your own
Cathedral Window QAL sampler quilt.
Don't forget to share photos of your blocks in the
Flickr Group for your chance to enter the giveaways!If you have any questions, please do not hesitate to shoot me an email at thatmoxiegirl [at} gmail {dot} com.